Lady Parts: A BARB Beauty Series
This edition: Don’t Peel Those Gels
by Stacy Conde
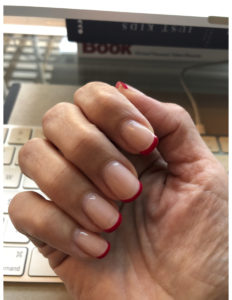
This is the gel manicure of a woman 3 weeks into a Coronavirus quarantine.

I got these sexy red tips from my girls at Dime Nails just before shelter-in-place became a thing. They have fared incredibly well and I am hesitant to throw in the towel on them, but it’s time. I have peeled off my gels plenty of times, but, with the advice of my friend Kristin Gyimah, owner of Dime Nails, I am going to master an at-home gel removal.
This is never ever going to replace the splendor of going to Dime to have my nails done by a professional, but in times of a global pandemic, I shall become the master of my own manicure.
L.A. based or visiting ladies, when it’s safe to return to business, treat yourself to a Dime mani/pedi. Visit the website here.
STACY CONDE: Tell us about Dime and your journey to become my favorite bad ass nail salon owner.
KRISTIN GYIMAH: It’s been quite the journey. I had previously pursued fashion merchandising and buying and thought that would be my career. I’ve loved painting nails since I was very young and getting my nails done is my ultimate beauty treatment. A fly ass set of nails was and still is my favorite accessory. I don’t carry a handbag and I wear the same simple jewelry all the time. Being in the fashion industry, I had my nails done regularly and would purposely check out nail salons all over LA. I couldn’t quite find exactly what I was looking for. A chic, open-space, relaxing and squeaky clean place with nail art as incredible as the playlists. All of this at a decent price with a side of champagne. With the support of my spouse, I finally quit my corporate job, made the dive into my nail obsession full-time, got my nail tech license and got right to opening Dime Nails LA.
STACY: Ok – gel removal. Break it down for us. How long is this going to take?
KRISTIN: About 20 minutes, maybe 30 if you are tender handed.
STACY: What do we need to prepare–what tools and materials do we need?
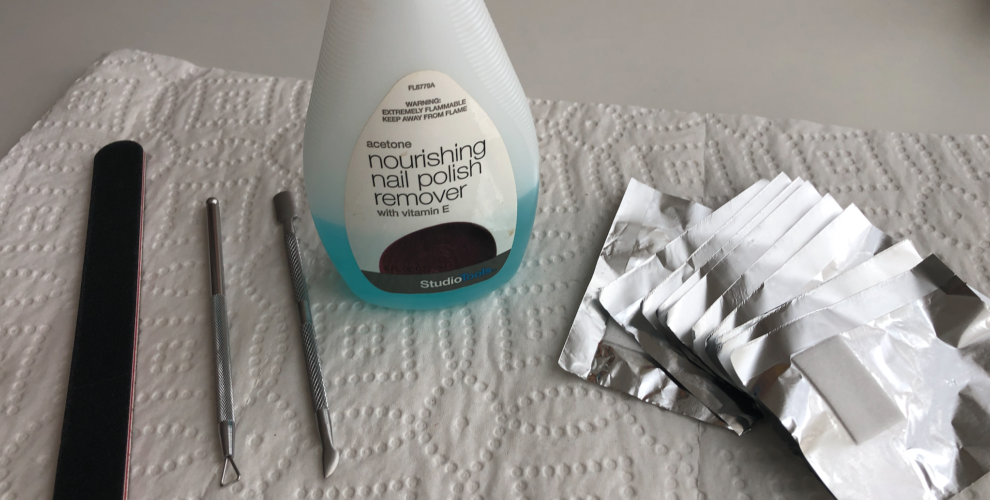
KRISTIN: You will need a few things but you should be able to get them all online through a local nail artist providing kits or at drug store like CVS.
- Standard sized Nail clippers
- Nail file (medium/fine grit)
- Nail buffer
- Metal Cuticle Pusher
- Cotton balls
- Foil (Reynolds wrap will do!)
- Acetone (stronger than polish remover, order it on Amazon)
- Paper Towel
- Hand towel you don’t care about
- Cuticle oil
- Hand lotion
STACY: Why can’t we just peel them off? (Tell us why that’s no bueno)
KRISTIN: It is mega no bueno because when you peel your gels, it removes layers of your healthy nail bed with it. Without softening the adhesion of the gel base to the nail bed you run the risk of continued nail damage.
STACY: Walk us through the process.
KRISTIN: Take your hand towel, fold in half and place your paper towel on top of the hand towel. This is your work area.
- Set out all your needed materials.
- If your nails are longer than you’d like, take the nail clippers and clip the excess length. Remember you will file them to shape and smooth so leave at least 2-3 cm of natural nail length for safety.
- Once all your nails are cut down, take the nail file and file off all the shiny top coat on your gel polish. You want to make sure you file slower when you are close to your cuticles so you don’t accidentally cut your cuticles.
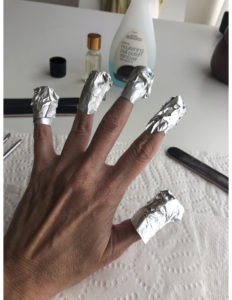
- Once all the shine is removed, place a cotton ball soaked in acetone over the gel covered nail bed, and wrap it with foil, tight.
- Squeeze the foil around the finger to get a good soak. There should be a bit of acetone dripping out of your foil when you squeeze, that is how you know you have enough on the cotton ball.
- We don’t recommend a bowl soak of acetone as using the foils stops the acetone from evaporating and makes the process more effective. Be patient with the soak!
- We recommend foil wrapping just one hand at a time so you can still live your life during this process.
- Each hand should soak for a minimum of 5-7 minutes to ensure the product is broken down properly.
- Remove one foil wrapped finger and use the metal scraper to scrape off the loose, flaking gel polish.
- Apply medium pressure to your scrape and if all the product does not come off the first time, that is okay.
- *Re-Wrap that finger with a new acetone soaked cotton ball and move onto a new finger to remove the product.
- Continue this process until you get to your natural nail bed. Remember, this should not be painful so be patient and careful with your removal.

- Always rewrap if the product won’t come off.
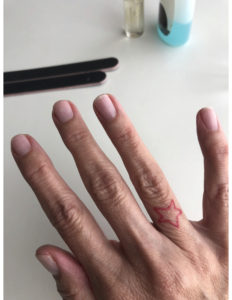
- After the gel is all (or nearly all) removed, take the nail file and *file/ shape your natural nails.
- *Pro-tip: Round the corners of your nails with the file to help avoid breaks as your nails will be a little soft after removal.
- Take the buffer and lightly buff the tops of your nail beds to smooth and clean any product residue or roughness.
- Hydration is key after an acetone soak.
- Apply *cuticle oil on cuticles and around the front side of your finger towards the free edge of your nail bed.
- Use hand lotion to help rub in the oil and hydrate your hands.
- *Pro Tip: If your cuticle looks a little rough, place cuticle oil on them and then buff them lightly and it will help smooth them out.

STACY: Now, with our naked nails, what can/should we be doing to treat them nice while we are waiting to get back into our fave salon for a full set?
KRISTIN: With so much cooking, dishwashing and hand washing, your hands and by default your nails will be dehydrated quicker than normal. Whether you have anything on your nails or nothing, try to put cuticle oil on 2-3 times a day and lotion your hands after each wash. It will help prevent your nails from becoming extra dry and brittle.
***
Visit Dimenails online!
Recent Stacy Conde Posts!
Beauty in a…Global Pandemic by Stacy Conde


0 Comments